Best Practices for Applying the Best Automotive Base Coat Paint
Understanding the Purpose of Base Coat Paint
Base coat is the layer that gives your vehicle its color and visual character. It sits beneath the clear coat and above the primer. While the clear coat protects and adds shine, the base coat provides depth, richness, and consistency.
The best automotive base coat paint offers several advantages, including smoother application, better color matching, and enhanced adhesion. Because the base coat is such an essential part of the painting process, following best practices during application ensures the finish retains its vibrancy and durability.
Choose the Right Base Coat Formula
Selecting the best automotive base coat paint is critical to achieving superior results. Two common types include:
Solvent Based Base Coats
These products are known for exceptional durability and quick drying characteristics. They are widely used in professional shops due to their convenient workflow. However, they require proper ventilation and adherence to safety standards.
Water Based Base Coats
These are more environmentally friendly and increasingly used in auto body refinishing. They provide excellent color accuracy and are ideal for multi stage finishes.
When choosing your base coat, consider the color, finish type, and compatibility with your clear coat and primer. Always follow the manufacturer’s recommendations for mixing ratios, spray gun settings, and curing times.
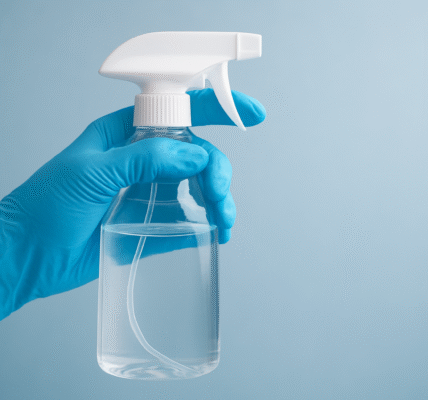
Essential Tools and Equipment for a Smooth Application
Proper tools help ensure a flawless result. Before applying your base coat, prepare the following:
• High quality HVLP spray gun
• Air compressor with moisture trap
• Mixing cups with accurate ratio markers
• Tack cloths
• Respirator mask
• Sanding equipment
• Clean, safe, and dust controlled workspace
The quality of your spray gun and the cleanliness of your environment directly impact the smoothness and consistency of your finish.
Prepare the Vehicle Surface Carefully
Surface preparation is the most important step in applying the best automotive base coat paint. Even minor imperfections can become more noticeable once color and clear coat are applied.
Steps for Proper Surface Prep
Clean the Surface
Wash the vehicle thoroughly to remove dirt, oils, and road contaminants. Degrease the surface using a quality automotive cleaner.
Sand the Area
Wet sanding with 600 to 800 grit creates a smooth surface while promoting adhesion. Ensure all scratches, oxidation, and old clear coat issues are corrected.
Repair Imperfections
Fill dents and scratches, then sand them smooth. Any flaws left at this stage will show through the base coat.
Prime as Needed
Bare metal or repaired sections should always be primed. Ensure the primer layer is fully cured and properly sanded before applying your base coat.
Mix the Base Coat Correctly
Proper mixing ensures optimal performance. Follow the manufacturer’s ratio guidelines, which usually involve a combination of base coat paint and reducer. Incorrect ratios can cause uneven coverage, poor adhesion, or mottling.
Stir thoroughly but gently to avoid introducing air bubbles. Strain the mixture using a paint filter to remove impurities that may clog your spray gun or cause texture issues.
Apply the Base Coat Smoothly and Evenly
A professional result depends on your spray technique. Here are the best practices:
Begin with a Test Spray
Test your spray pattern and pressure on a scrap panel. Adjust until the flow is even and consistent.
Apply Light, Even Coats
Use sweeping motions from side to side, overlapping each pass by about 50 percent. Keep the spray gun approximately 6 to 8 inches from the surface.
Allow Proper Flash Time
Each coat should dry enough to look matte before the next is applied. Insufficient flash time can lead to streaks, dripping, and solvent popping.
Apply Additional Coats Gradually
Most colors require 2 to 4 coats for full coverage. Metallic and pearl finishes may need extra passes to achieve uniform depth.
Inspect for Imperfections
Use bright lighting to spot inconsistencies. Lightly tack between coats to remove dust particles.
Pay Attention to Metallic and Pearl Finishes
These specialized finishes require additional care. Holding the spray gun too close or too far can cause blotching. Apply your final coats using a blend or drop coat to distribute metallic particles evenly.
Avoid sanding between base coats on metallic colors. Sanding can alter the metallic pattern. Only tack lightly to remove dust.
Allow Proper Curing Time Before Clear Coat
Even after it appears dry, the base coat needs proper time to settle. Rushing into clear coat application can trap solvents and cause clouding or wrinkling.
Check the manufacturer’s recommended flash and drying times. Once the base coat is fully cured, proceed with clear coat application to seal and protect the finish.
Final Checks and Touch Ups
Inspect the surface for any uneven areas or minor defects. Spot repair small issues by lightly reapplying base coat and blending carefully.
Consistent attention to detail and patience throughout the process will ensure the best results. With the right techniques and high quality products, your vehicle will achieve a smooth, vibrant finish that lasts.
Frequently Asked Questions
What is the purpose of the base coat in automotive painting
The base coat provides the vehicle’s color and visual effect. It sits between the primer and clear coat, delivering depth and vibrancy.
How many coats of base paint should I apply
Most jobs require 2 to 4 coats. Metallic or pearl finishes may need additional layers for consistency.
Can I sand the base coat before applying clear coat
Base coats, especially metallics, should not be sanded. Only lightly tack to remove dust.
What causes streaks or blotches in metallic paint
Uneven spray technique, incorrect distance from the panel, or improper flash times can lead to blotching. Using a drop coat helps distribute metallic flakes evenly.
How long should I wait before applying clear coat
Follow the manufacturer’s drying time instructions. Typically, the base coat should appear matte and dry to the touch before moving forward.